
Where to install the HHO kit in my car
Where Can I Install the HHO Kit in My Car?
If you’re planning to install an HHO kit, one of the biggest challenges is finding space—modern vehicles offer very little room under the hood. So the question is:
Where exactly can you install the HHO kit in your car?
The answer depends on your vehicle’s layout and available space. Let’s look at your options and the pros and cons of each.
Engine Bay or Trunk? Two Installation Options
There are two possible locations to install your HHO kit:
-
Inside the engine bay (recommended)
-
In the trunk (alternative option)
Each comes with its own considerations.
✅ Installing in the Engine Bay (Preferred)
Most manufacturers don’t design extra space for aftermarket kits. But with a bit of exploration, you may still find suitable spots.
Tips for Finding Space:
-
Remove plastic engine covers or inner fender guards
-
Check behind or beneath the front bumper
-
Look near the radiator or frame rails
-
Be sure it’s away from direct heat, wind, sand, and stones
🔧 Pro tip: The closer the kit is to the engine, the shorter and more efficient the wiring and hoses will be.
🚫 Installing in the Trunk (Not Recommended)
If there’s absolutely no space up front, you can install the kit in the trunk—but it’s less ideal.
Why?
-
You’ll need to run long power and gas lines through the vehicle
-
Cables can break or overheat if not properly secured
-
Gas leakage in a sealed trunk has no ventilation, which is unsafe
-
It reduces your cargo space
Unless you’re out of options, always choose the engine bay first.
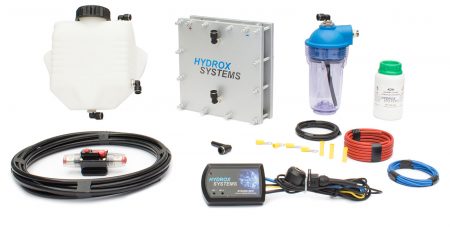
🔩 What Needs to Be Installed?
There are four main components of an HHO kit. Here’s where and how to install each one:
1. HHO Dry Cell
Mount the Dry Cell between the front bumper and radiator or along the frame.
-
Secure it firmly to the chassis using bolts
-
Ensure you can connect hoses easily to the Push-In fittings
-
Position it upright and protected from road debris
2. HHO Reservoir
Install the reservoir above the Dry Cell, as it supplies electrolyte via gravity.
-
Choose a high and stable position in the engine bay
-
Secure it well to avoid vibration or leaks
3. HHO Bubbler
This is a small device and easy to place.
-
Install it anywhere safe in the engine bay
-
Ensure the condensation drain pipe can drip freely
-
Keep it upright to function properly
4. Dynamic PWM Controller
The Dynamic PWM is compact and needs a cool, dry, and accessible spot.
-
Place it in a ventilated corner of the engine bay
-
You’ll need access to its buttons during setup
-
Follow the included manual for calibration
🧪 Final Step: Add Electrolyte
Once you’ve connected all hoses and wires:
-
Mix and fill the electrolyte (raw material for producing HHO gas)
-
Check all fittings and seals
-
Power up the system for calibration
If you’re handy and have the tools, you can finish the full install in under 2 hours.
🚛 What About Trucks and Heavy Equipment?
Larger vehicles like trucks, buses, tractors, and generators use Plug & Play HHO systems. These come pre-installed in a metal case, ready for immediate use—no custom mounting required.
🧠 Conclusion: Choose Smart Placement for Performance and Safety
Installing an HHO kit isn’t difficult—but where you install it matters. Always inspect the engine bay first, secure all components properly, and follow safety guidelines.
With the right placement, your HHO system will run efficiently, reduce emissions, and improve fuel economy—all while staying safe and discreet.
🔗 Ready to start saving fuel and cutting emissions?
Explore our full HHO kit solutions HERE
Subscribe our Newsletter